 Adjustable hose clamps were invented in 1921 by Lumley Robinson, a former Royal Navy Commander. Little did he know that the humble hose clamp would go on to become one of the most widely-used tools among plumbers, mechanics, and DIYers alike.
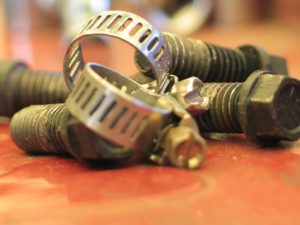
Stainless hose clamps for projects are usually limited to withstanding moderate pressures, such as those found in home and automotive applications. For plumbing emergencies, hose clamps are ideal for fixing a leak until a permanent solution can be secured. This will make sure that you can get your water running again quickly, without causing serious water damage, even if you can’t get a plumber right away.
The next time you discover an inconvenient plumbing leak, use the following steps to seal leaky pipes with stainless hose clamps for projects.
For small leaks:
- Cut off the water supply to the damaged pipe.
- Wrap electrical tape around the pipe where the hole is. Run the tape around the pipe several times.
- Once the hole is well covered, place a small hose clamp around the pipe. Loosen the screw completely by turning it counterclockwise. Lay the clamp over the pipe and put the two ends together again, turning the screw clockwise until it grips the clamp.
- The hose clamp should land exactly over the spot where the hole is. Tighten the hose clamp to ensure a secure (though temporary) seal.
For large leaks:
- Cut off the water supply to the damaged pipe.
- Find a piece of rubber that to cover the hole—a small section taken from an old garden hose should work well.
- Cut the piece of rubber or hose to make it large enough to cover the hole completely, with two or three inches of overlap on the edges.
- Place a large hose clamp over the pipe. Loosen the screw completely by turning it counterclockwise. Lay the clamp over the pipe and put the two ends together again, turning the screw clockwise until it grips the clamp.
- Tighten the hose clamp down onto the piece of rubber.
In conclusion
In almost all cases, you will need to properly repair or replace the broken pipe later on—this isn’t a permanent solution for a plumbing leak. But with these instructions, you can use stainless hose clamps for projects to temporarily fix just about any leaky pipe.
