I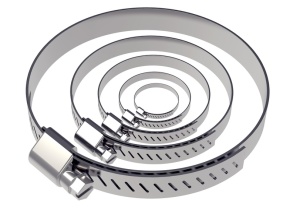 n 1921, former Royal Navy Commander Lumley Robinson invented a simple tool that would fast become one of the most trusted, widely used instruments in the world. We’re talking — of course — about the humble hose clamp. These devices are used by plumbers, mechanics, and home improvement experts for a variety of tasks, but they can be especially handy in emergency plumbing situations.
When a pipe suddenly starts leaking, you’ll need to act fast if you want to prevent serious water damage. And there are a number of quick, DIY fixes you can rely on to fix broken pipes in your home. But without a hose clamp in your toolbox, you won’t be able to get much further than step one: turn off the water.
That means if you want to be able to fix your pipes in an emergency, then you’ll need to have a few hose clamps at the ready. And just to be safe, you should have either adjustable hose clamps or several different hose clamp sizes around so that you can be prepared for anything. So how can you use various types of hose clamps to save a leaking pipe? Because of the constant tension hose clamps provide on all sides of the hose or pipe, they can securely fasten patches into place. And while this won’t seal the pipe forever, it can provide the quick fix you need to get your water up and running again.
- For very small holes, wrap electrical tape around the pipe repeatedly. When you have the hole thoroughly covered, small hose clamps can ensure a tight (albeit temporary) seal.
- For larger leaks, search around for a piece of rubber that will cover the hole. An old length of garden hose can be used in a pinch. Simply cut the rubber or hose into a wide enough piece to completely cover the hole, and then some. Ideally, the patch should extend a few inches to the sides of the hole. Then, use an adjustable hose clamp to tighten the patch into place.
Remember: When you use hose clamps to help patch and repair leaky or broken pipes, you will almost always need to replace the pipe eventually. But for a fast and easy DIY repair job, there’s nothing more useful than a handy adjustable hose clamp.

I couldn’t resist commenting. Well written!